
Windows for Open Source Development
I've long used macOS or Linux when I make my Open Source contributions, but I think that the time is right to try Windows as a full-time development environment. If you want to jump on board, this article series is for you!
A Guide for Open Source Developers Moving To Windows
In this first article we'll start with the installation and configuration of the Windows Subsystem for Linux, and get you to the point where you can clone and compile/run your OSS projects.
The series will continue with other articles and advice on using Windows as your daily driver if you're used to macOS or Linux desktops.
Preface
In a discussion with Rob Conery I made the bold statement that with the addition of the Windows Subsystem for Linux 2(WSL2) there were no blockers for the average Open Source developer to use Windows as a daily driver.
To put my money where my mouth is, I've (personally) purchased a Surface Laptop 3, and I'm going to use it as my daily workhorse for the next 30 days. We'll call it the #30-daywslhallenge.
Find other articles in this series with this link.
Assumptions
This guide is for you if you're traditionally a macOS or Linux desktop user and you're looking for information on how to use a Windows 10 device with Windows Subsystem for Linux as your primary development environment.
- I’m assuming you’re coming from a *Nix system like MacOS or a Linux distribution
- I’m assuming you’re looking for a setup on Windows that feels like the dev environment that you already have
- I’m assuming that you’re familiar with the bash or zsh shell, and have basic skills on the command line
- I'm assuming that you're open minded enough to stay with the switch beyond the first few days of discomfort with something new
Getting Started
As an open source developer, almost all the projects I work on are best developed on Linux. My goal in this guide is to set up a modern Windows 10 environment that rivals the development experience on Linux while providing the comforts of a mainstream operating system. And by "comforts" I mean things like working audio, long battery life, and stable office suites. Linux has come a long way, but it's still hard to make it a daily driver for most people.
Installation
After unboxing your new laptop the first thing to do is rename it. Windows comes with a randomly generated host name by default. Yuck!
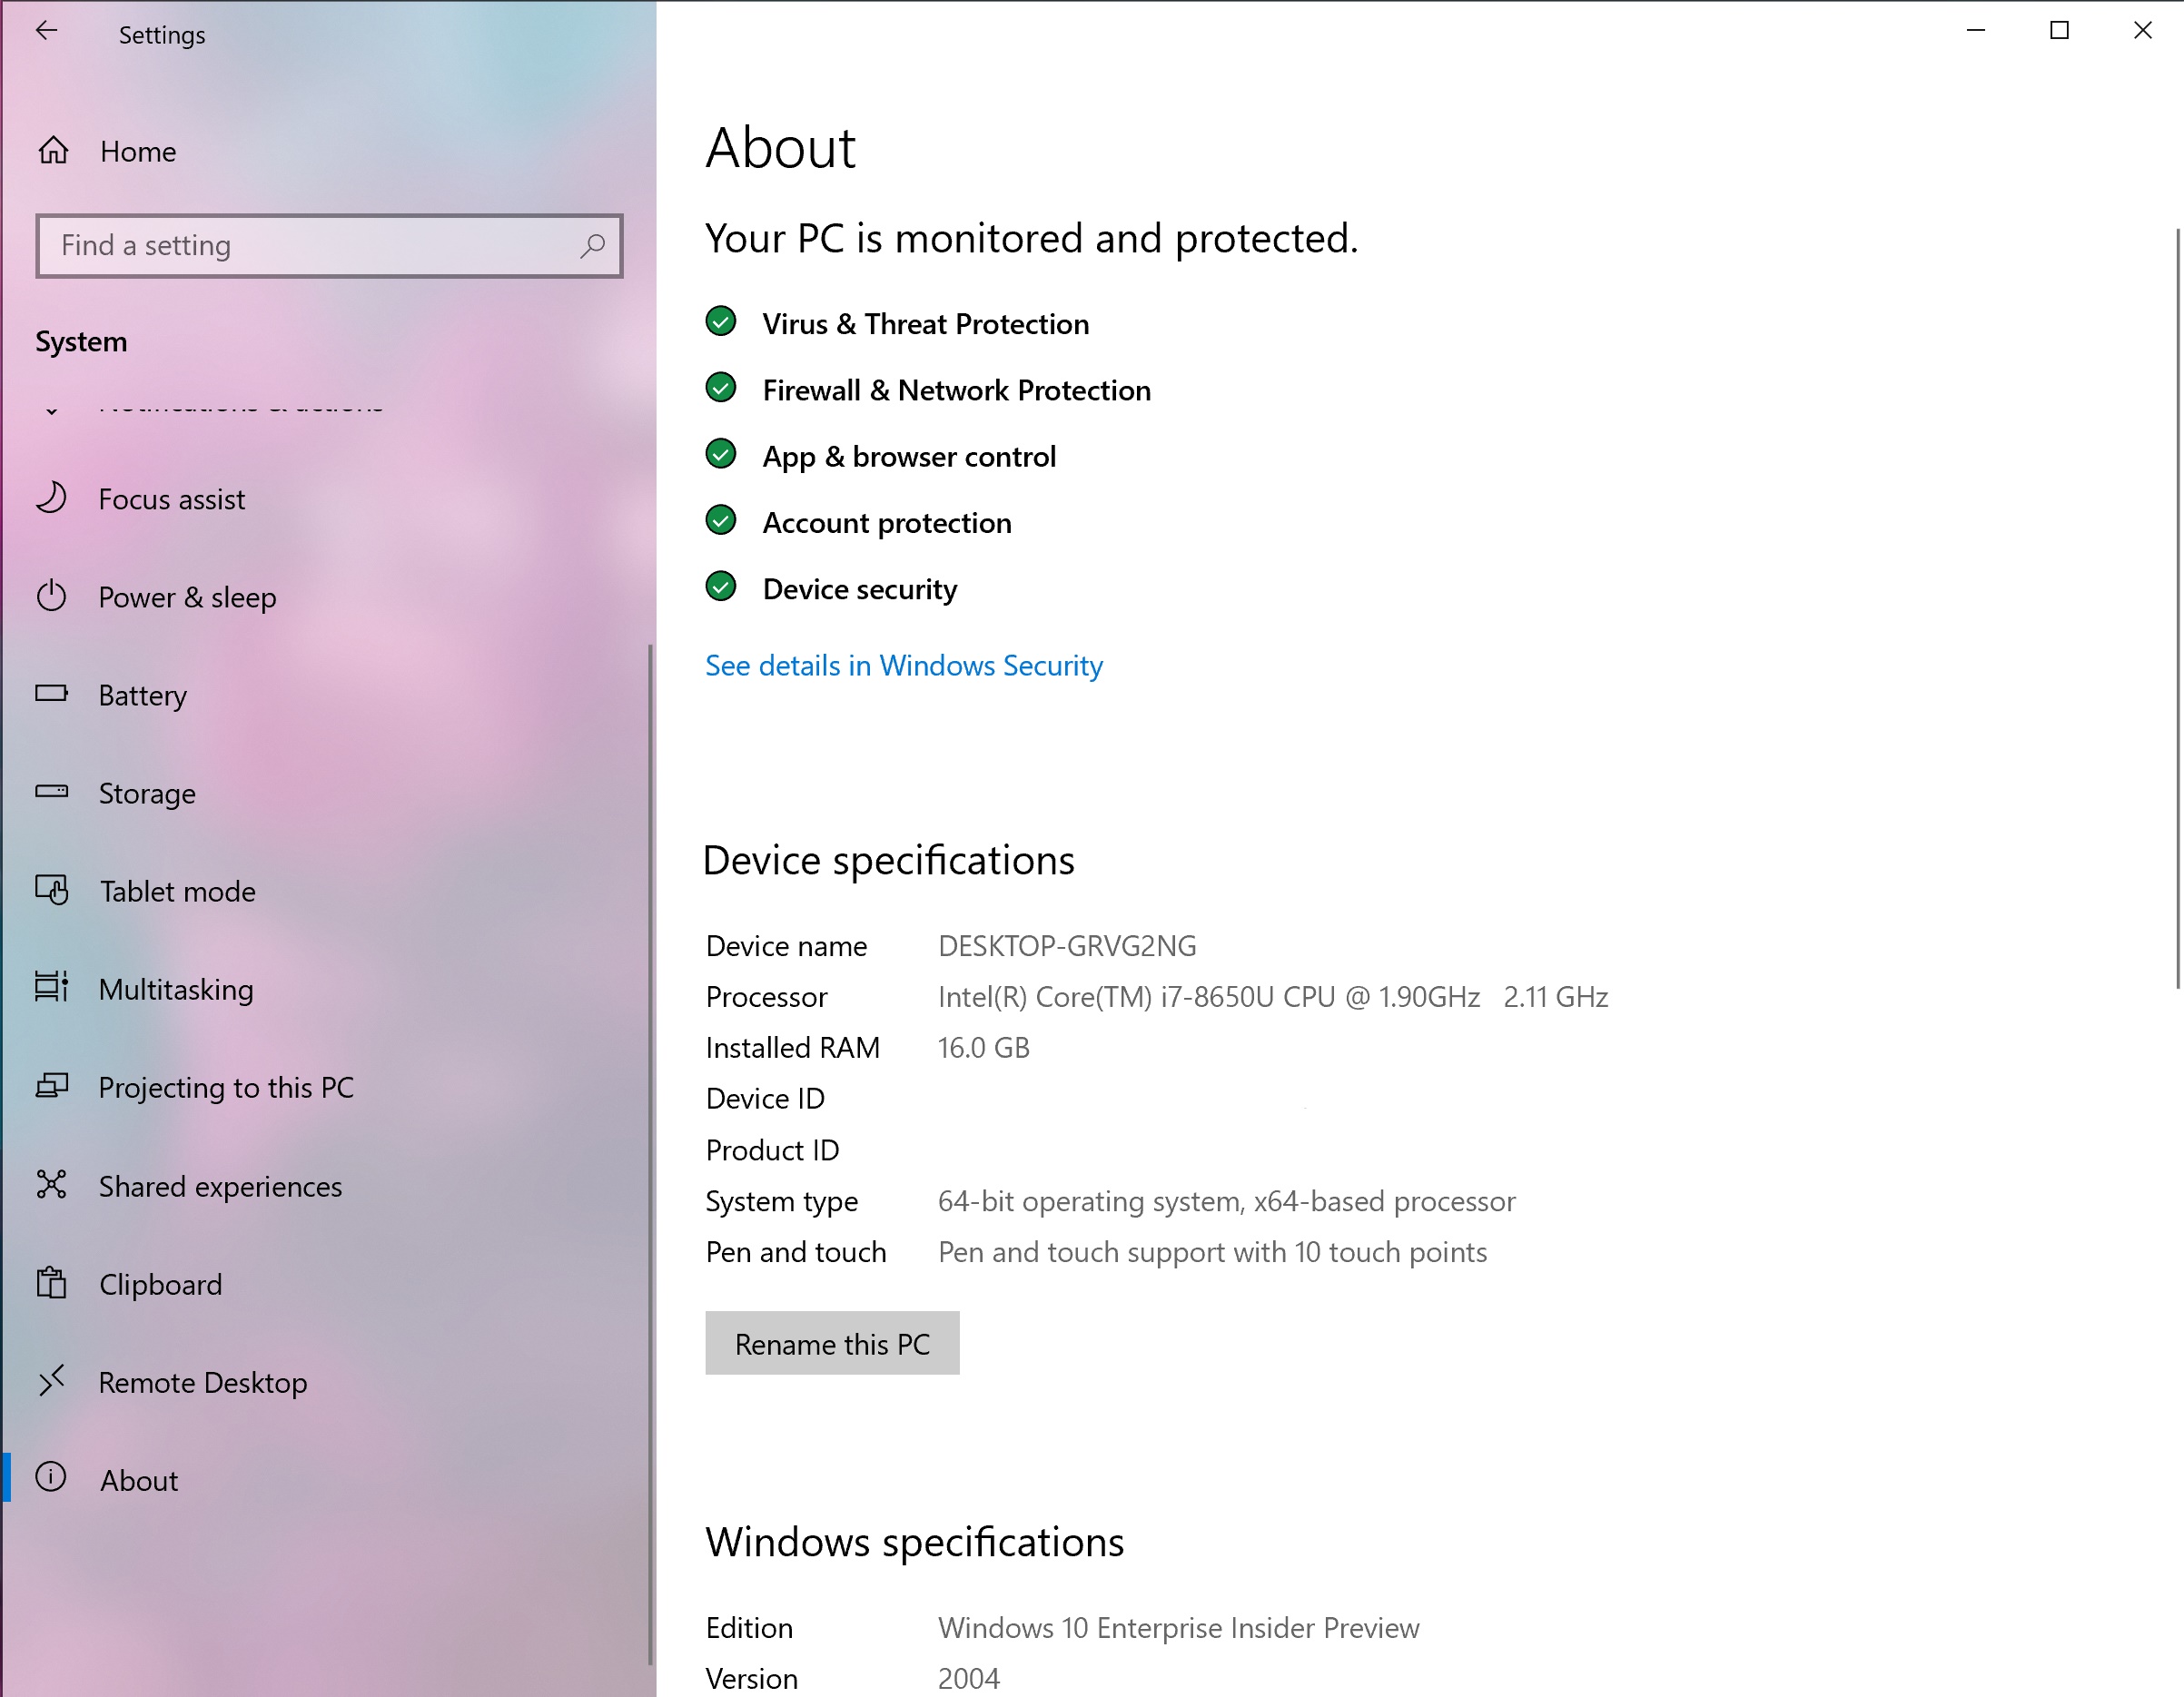
- Rename your PC
Desktop-R4NDH3X isn't my speed. When it asks you to reboot, you can choose the "later" option, we have plenty of rebooting coming up.
Go to Start > Settings > System > About and click the Rename this PC button. I like to name my computers after planets in the Dune series of novels, but you do you...
- Move to Windows Insider to get beta builds.
Update: -- This is no longer necessary, WSL2 is enabled in current and previous releases of Windows now --
Open the Start Menu, then choose Settings, then Update & Security
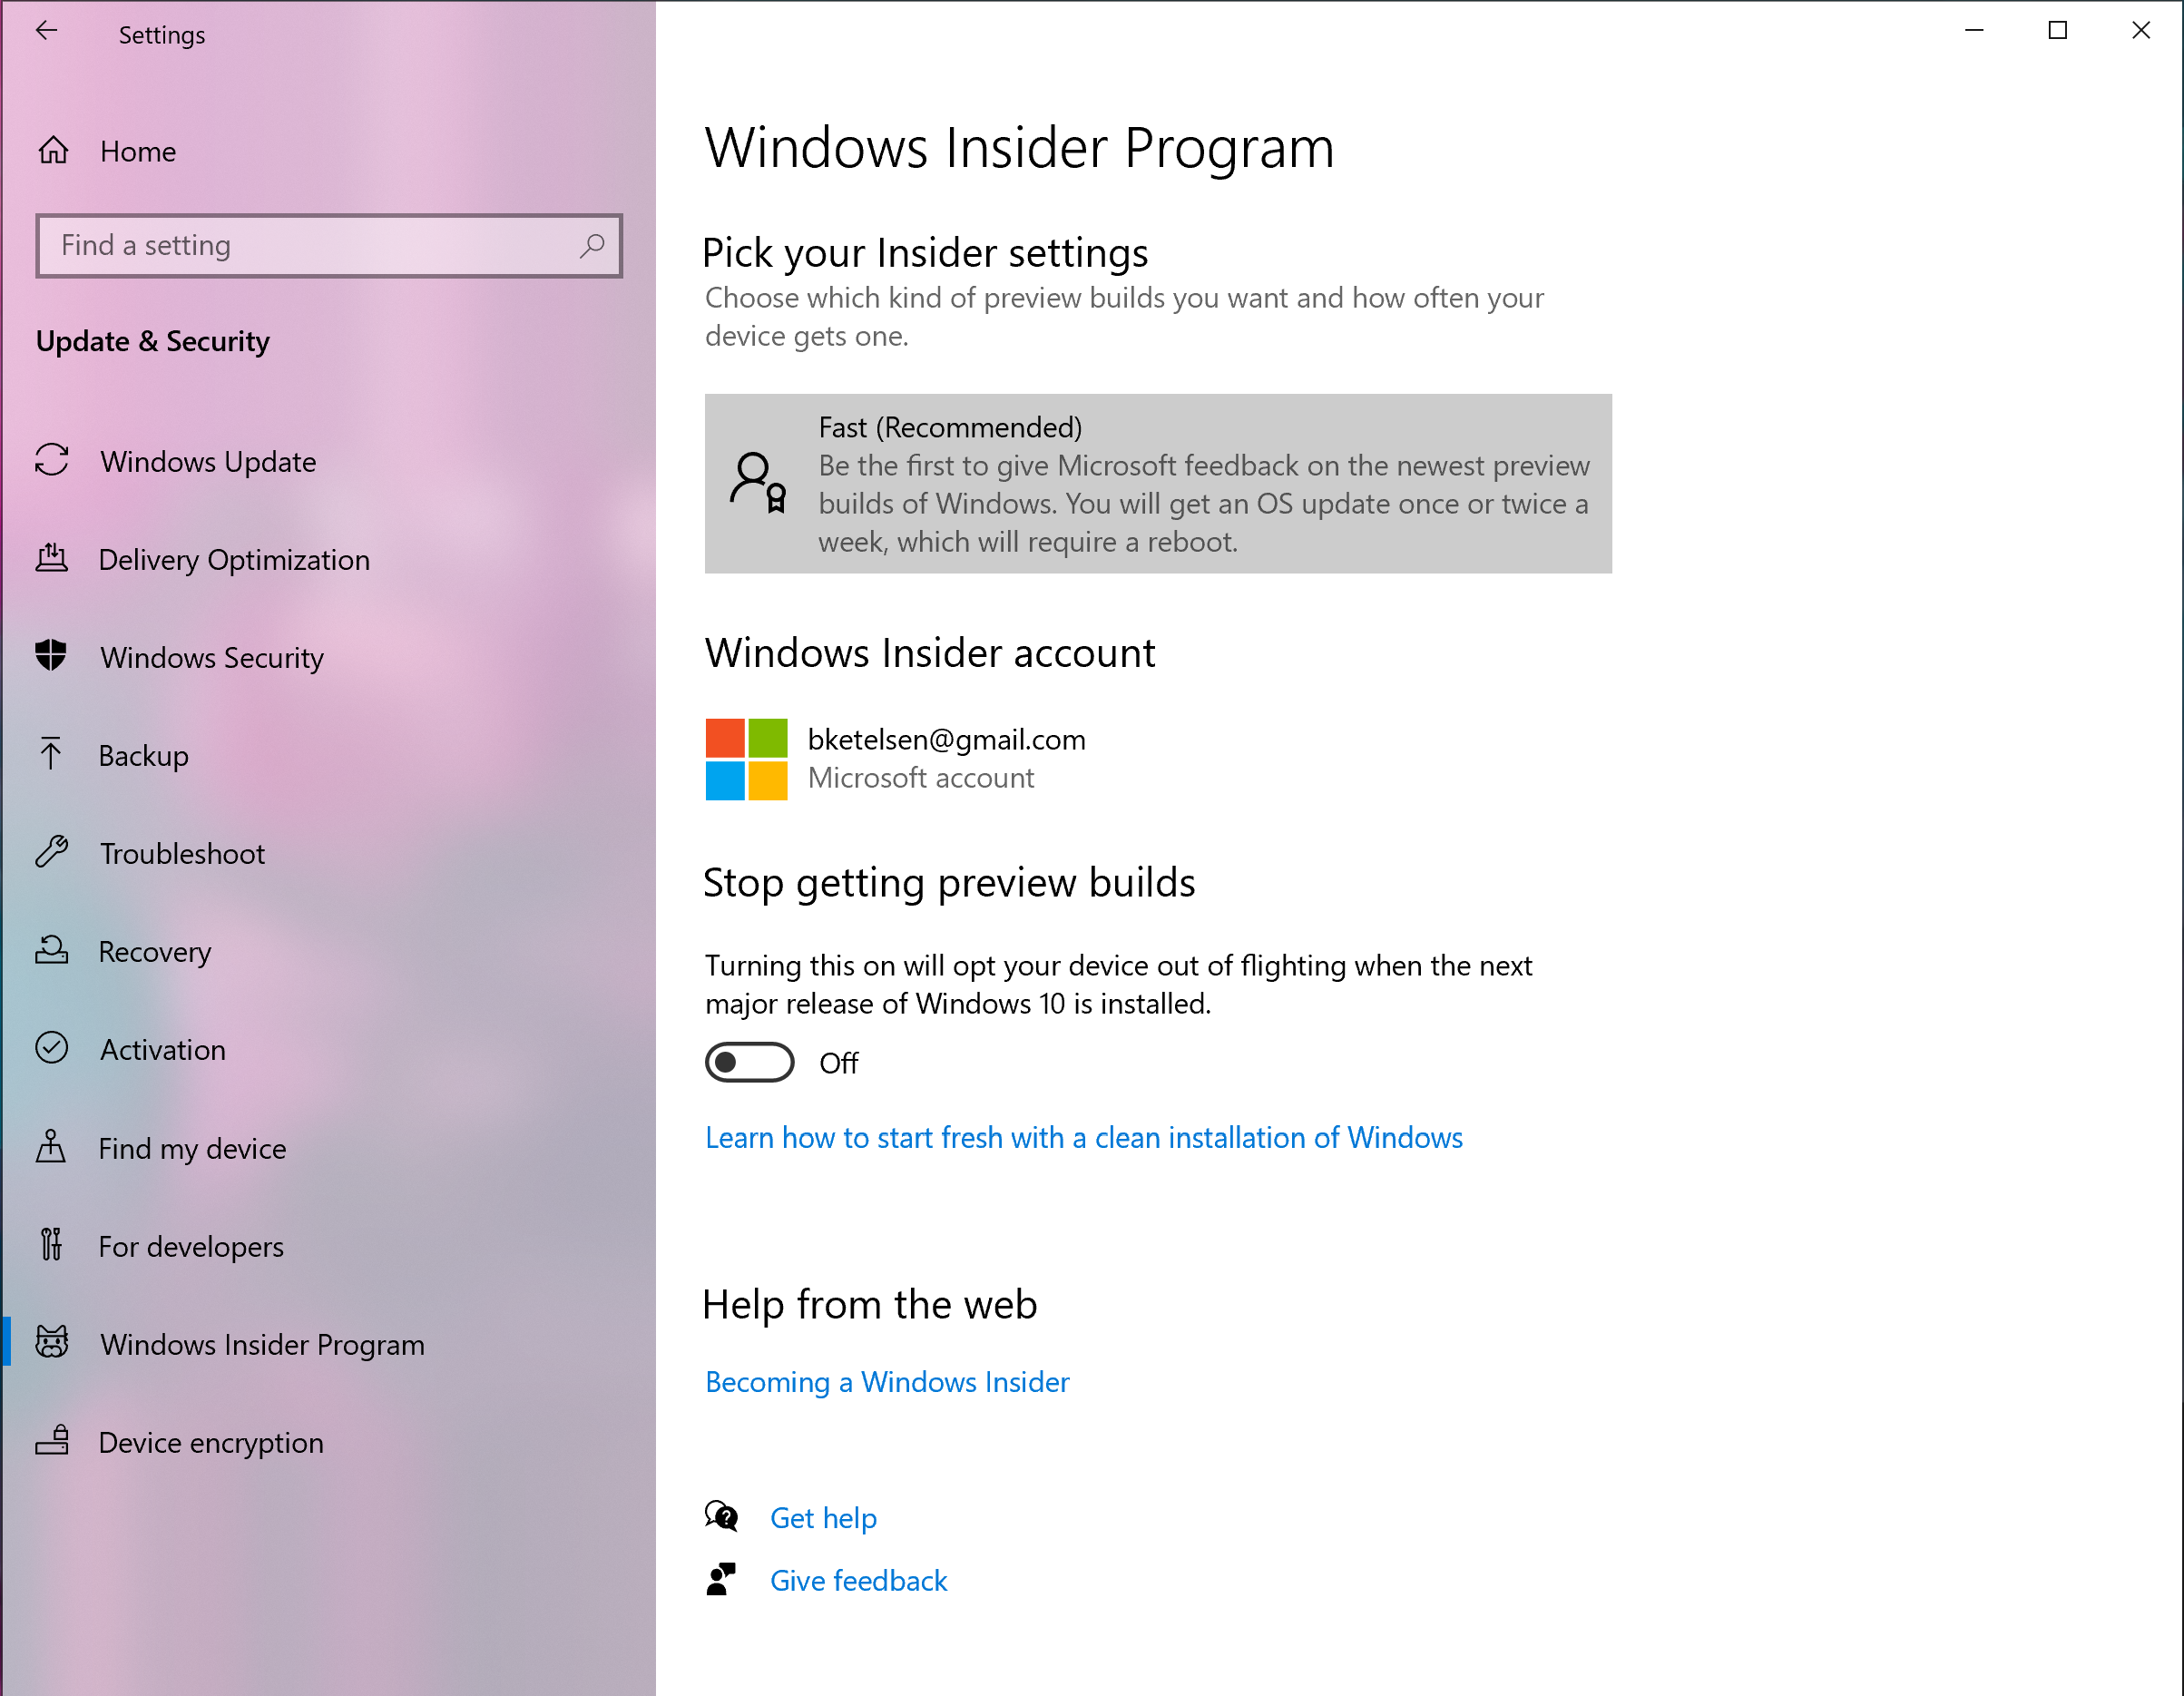
Add or link an account, and set up Windows Insider preferences to be either "Slow Ring" or "Fast Ring" to enable WSL2. Enabling Windows Insider will require a reboot. Slow ring is the minimum required for WSL2 (build 18917 or higher), Fast ring has all the latest features and potentially some bugs that could prevent you from being productive. Use your judgement to choose which to install based on your tolerance for risk.
- Windows Update
Now go into Windows Update and get the updates. One of them will be the version that enables WSL2. When all your updates are installed you can proceed.
- Install the new Microsoft Edge (optional, but awesome)
Head to the edge download site and install the new version of Microsoft Edge. It's based on Chromium and a lot nicer than the older Edge. Be sure to checkout the multiple profile support. I have profiles for different contexts (work, banking, personal) and really enjoy the separation of cookies.
It will be automatically installed after an update or two, so this isn't critical, but it's nice to get it out of the way up front.
- Install the features to enable WSL2
Open PowerShell as an Administrator:
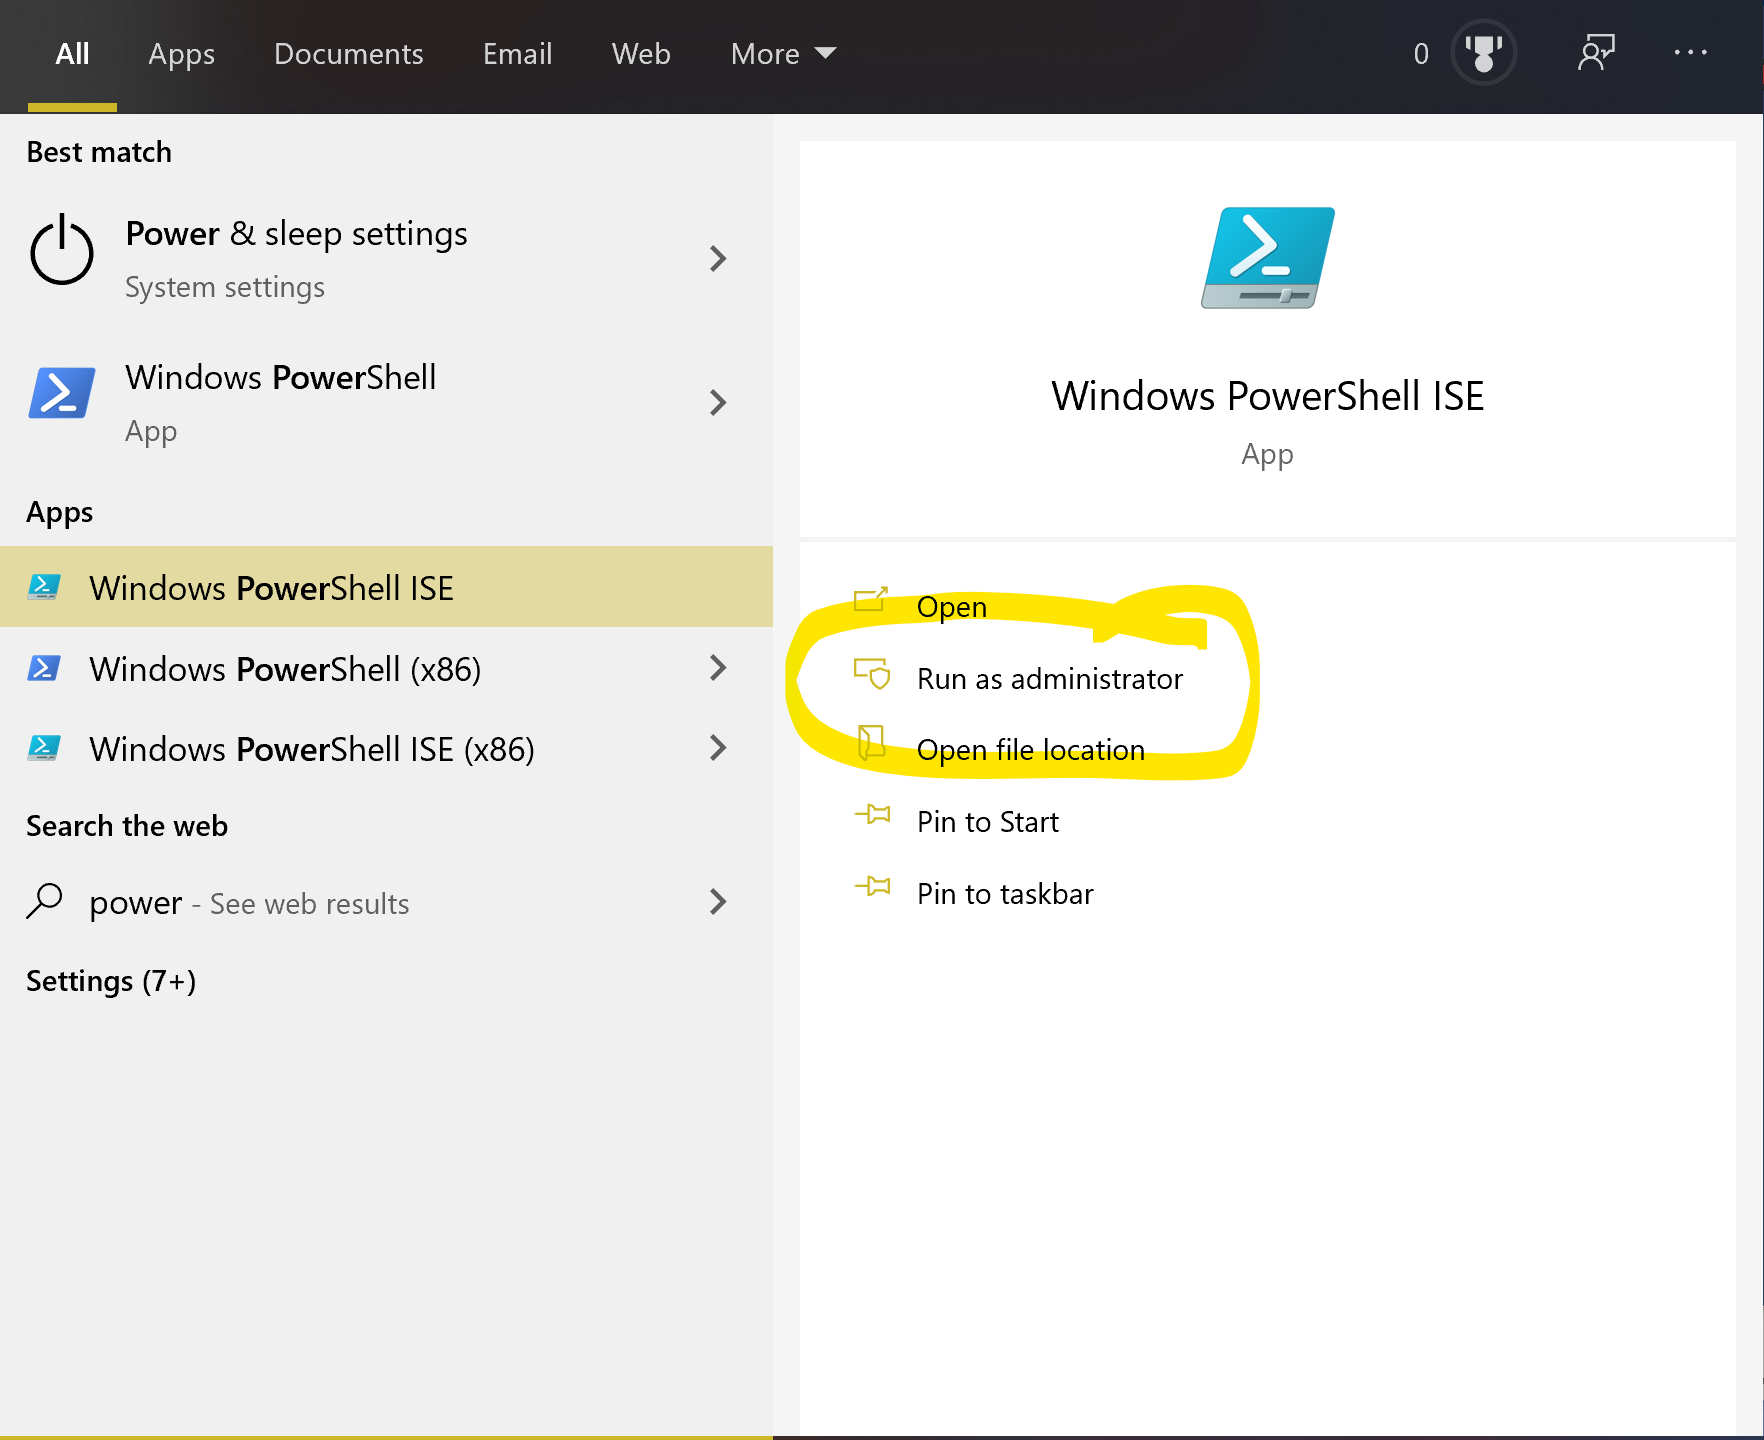
run these two commands:
dism.exe /online /enable-feature /featurename:Microsoft-Windows-Subsystem-Linux /all /norestart

dism.exe /online /enable-feature /featurename:VirtualMachinePlatform /all /norestart
This enables the Virtual Machine Platform, which gives us the hypervisor from HyperV without installing HyperV. It is also available on Windows 10 Home, which has previously been a blocker for developers who want to run Docker, etc, on Windows 10 Home edition.
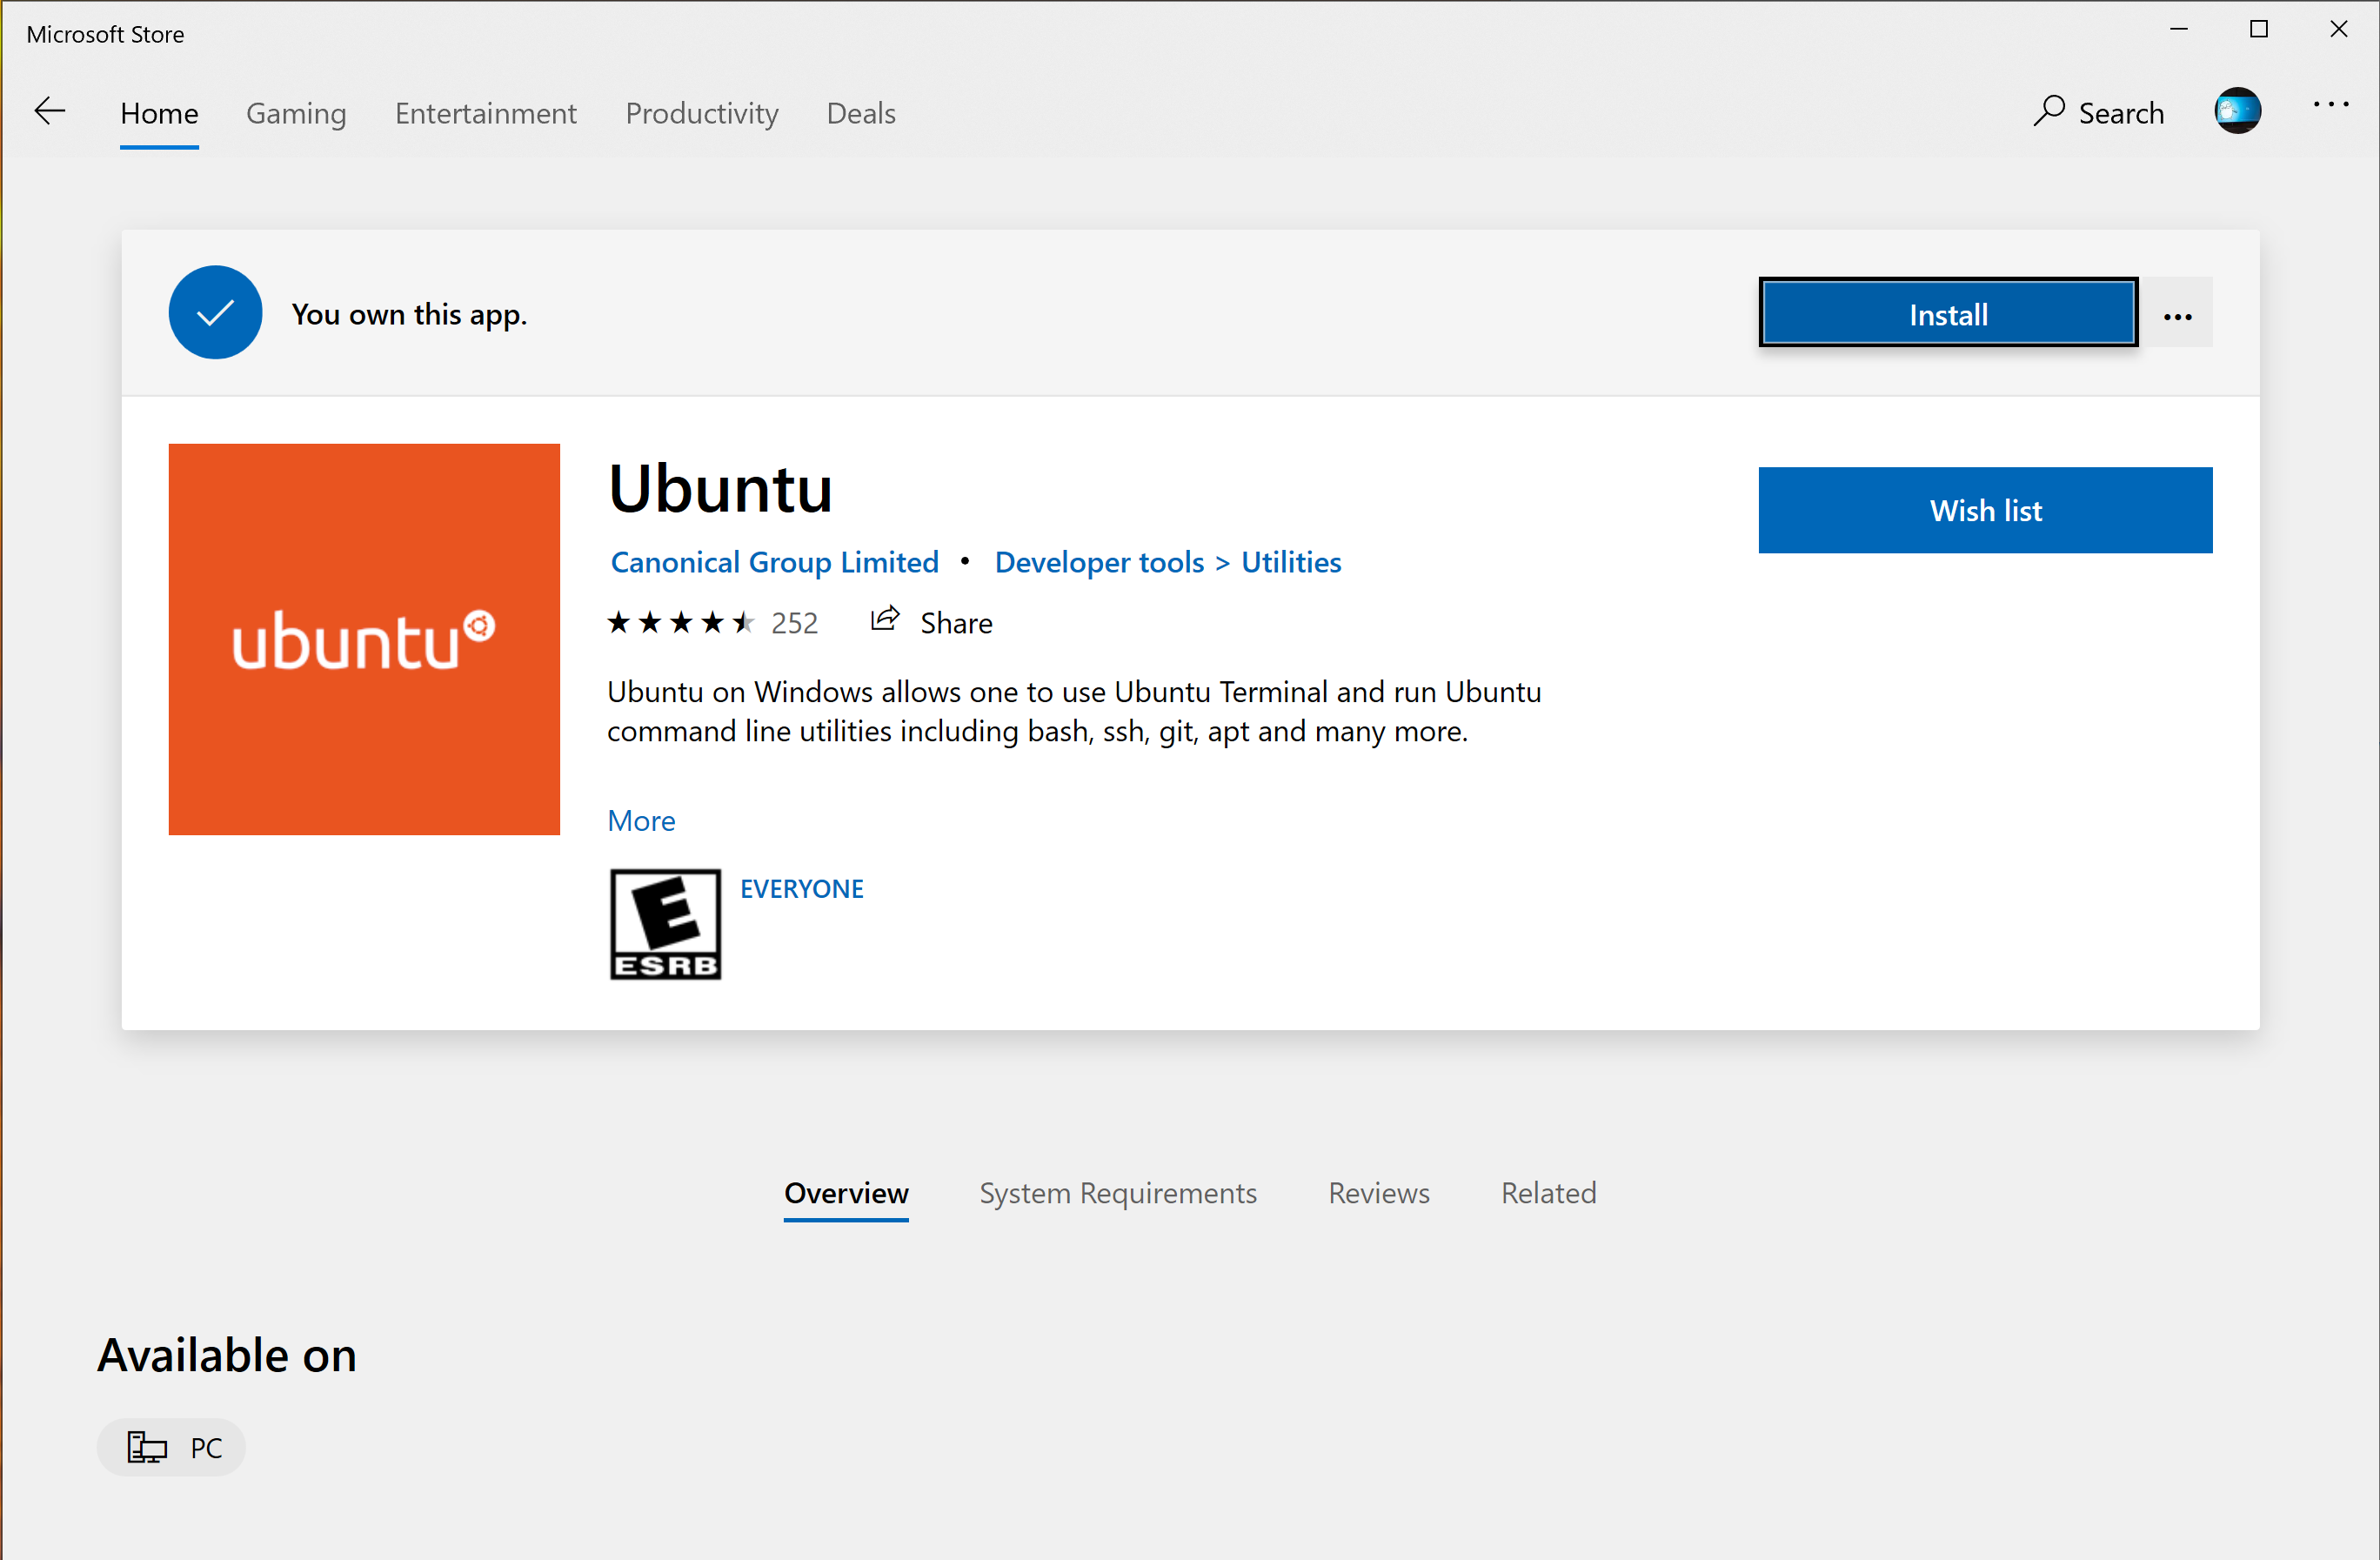
- Microsoft Store
Open the Microsoft Store app and install any updates that are pending. If you want to use X11 applications from WSL you'll need an X server too. I use X410 and heartily endorse the purchase if you can catch it ON SALE, like it is now for $9.99 US. Don't pay full price though, there are others that are available if X410 isn't on sale.
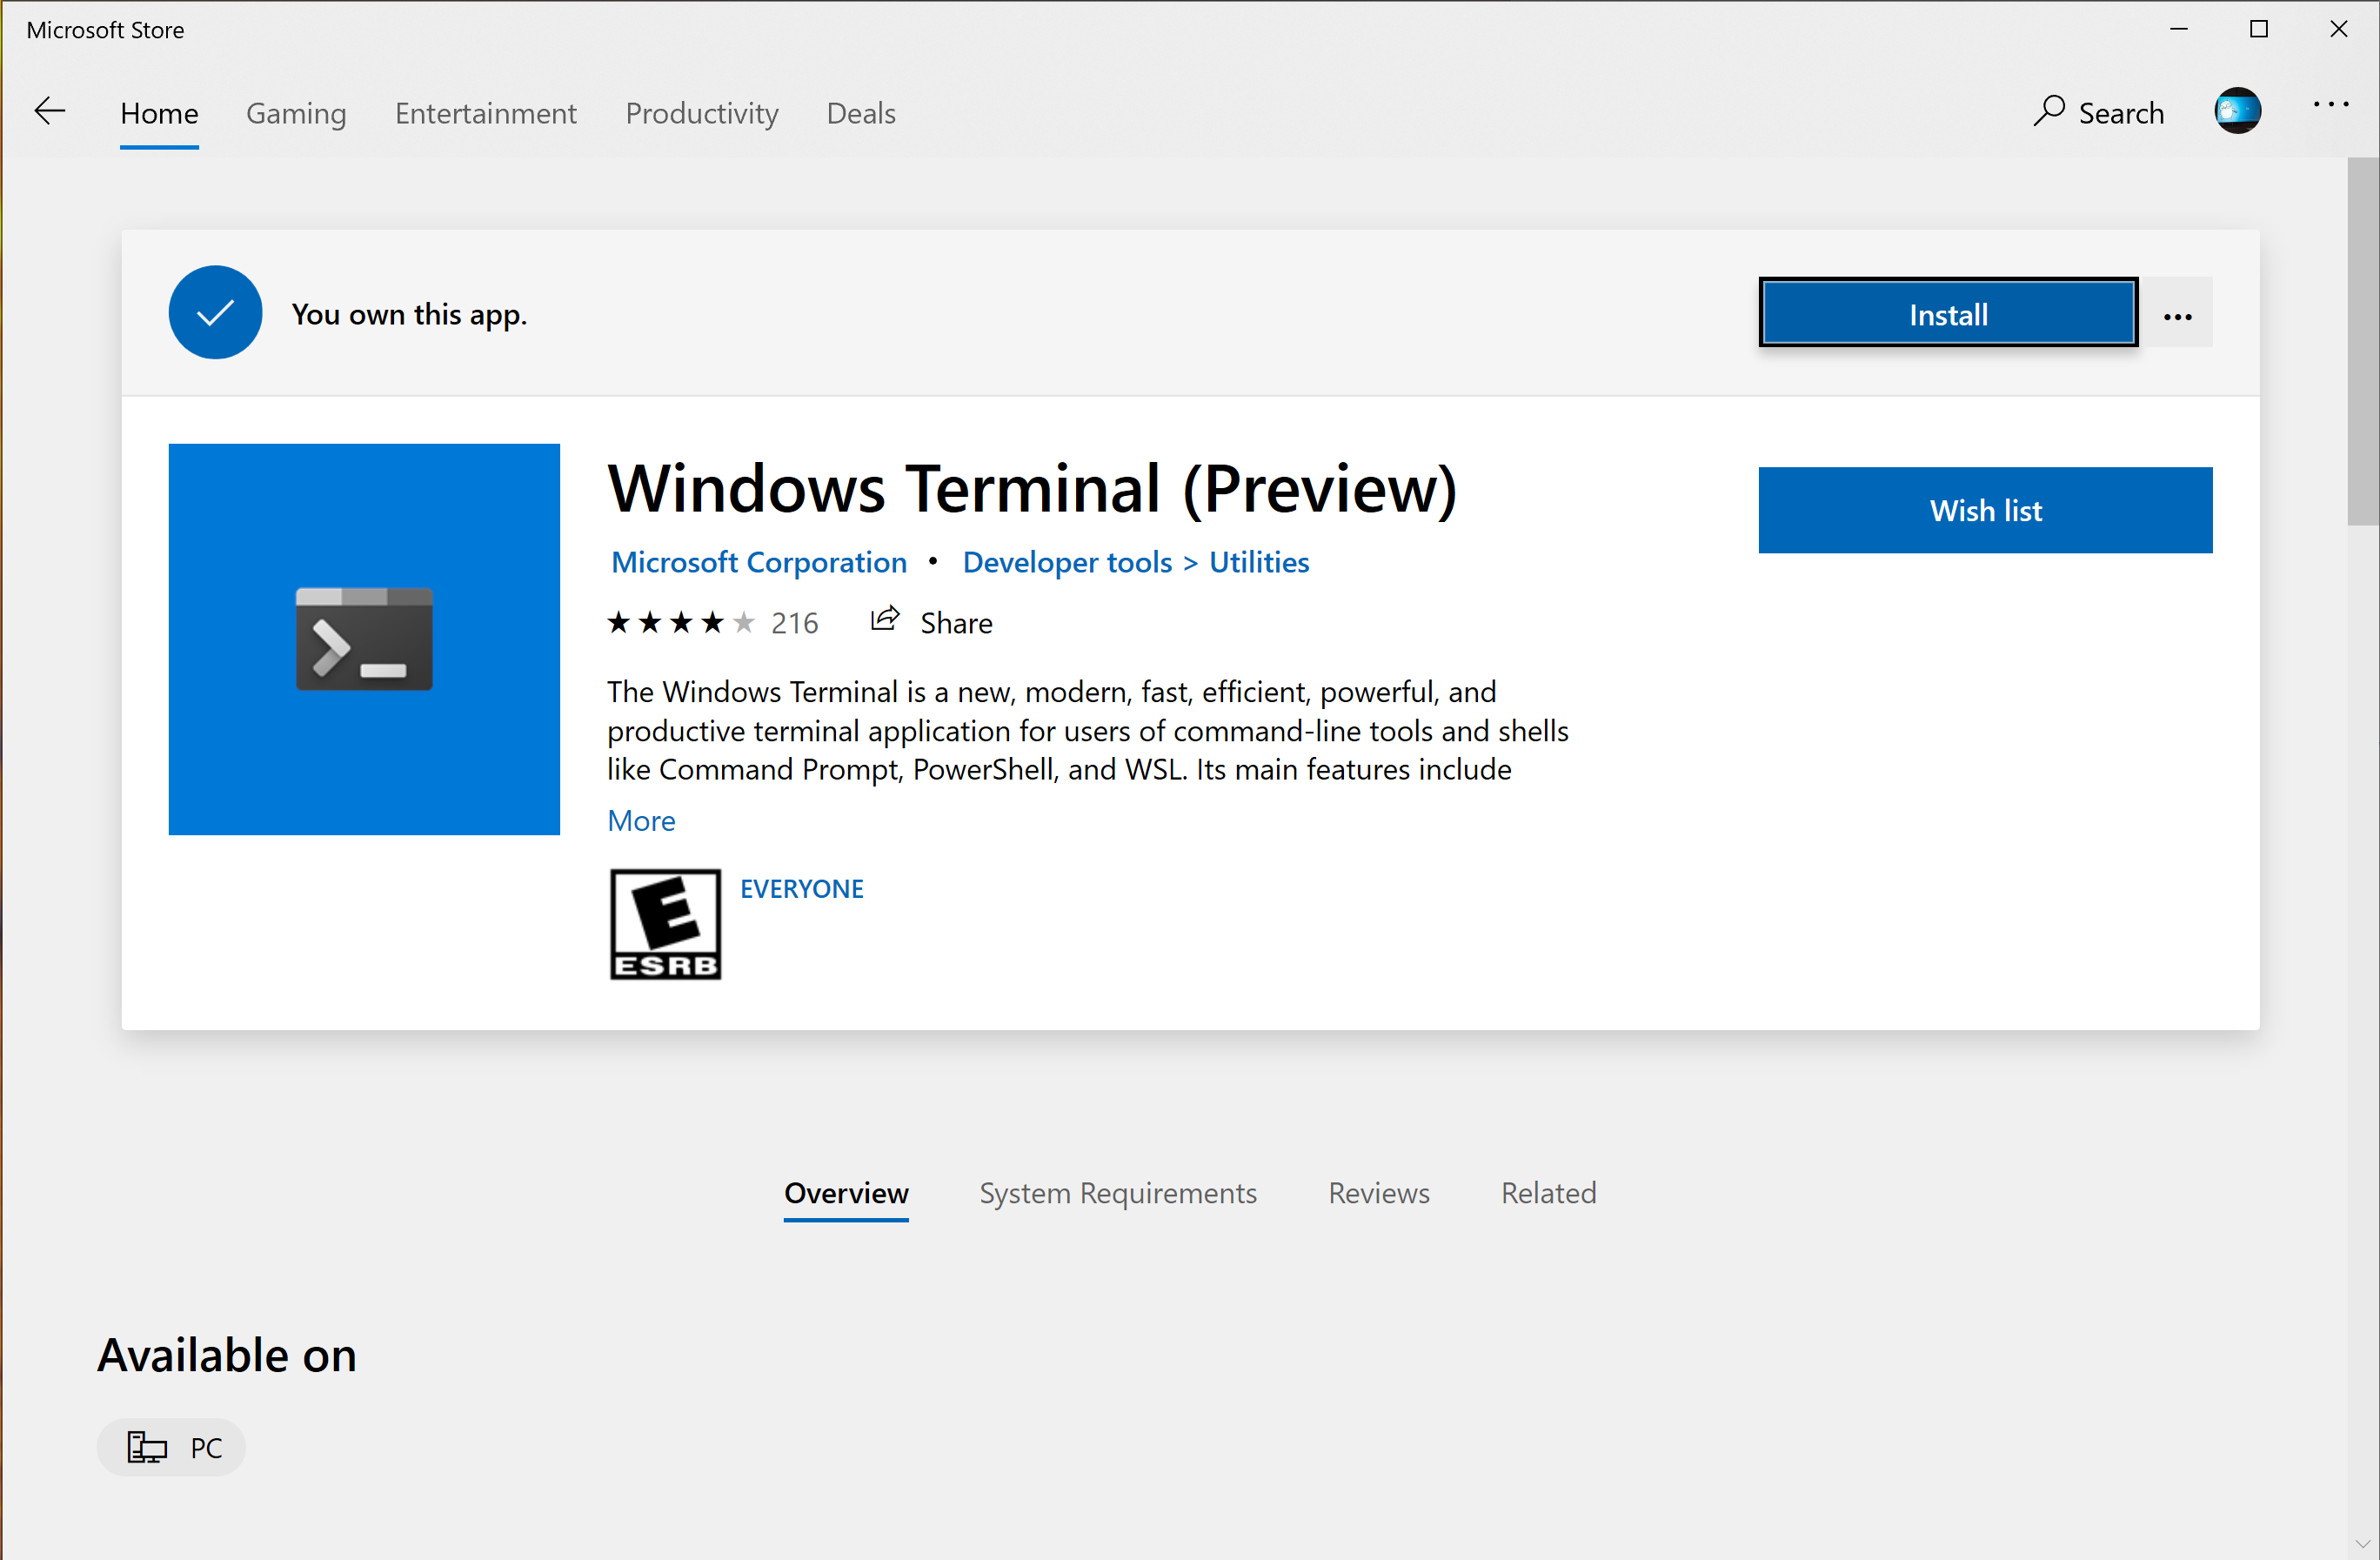
Install Ubuntu from the Microsoft Store. Don't pick a versioned app, just choose the Ubuntu app without a version. It follows LTS.
Let's and make WSL 2 our default per the Installation Instructions for WSL 2. If we don't do this we risk running WSL 1 accidentally and WSL 2 has much better performance. Let's open a terminal and run:
wsl --set-default-version 2
Install Windows Terminal. The new Windows Terminal is a solid terminal emulator, and you'll feel at home here if you're used to iTerm2 or Gnome Terminal. I didn't mark this as optional, because you're used to using a real terminal, and Windows Terminal is the only thing that will satisfy you. Trust me on this.
- Open the
Ubuntuapp from your Start menu

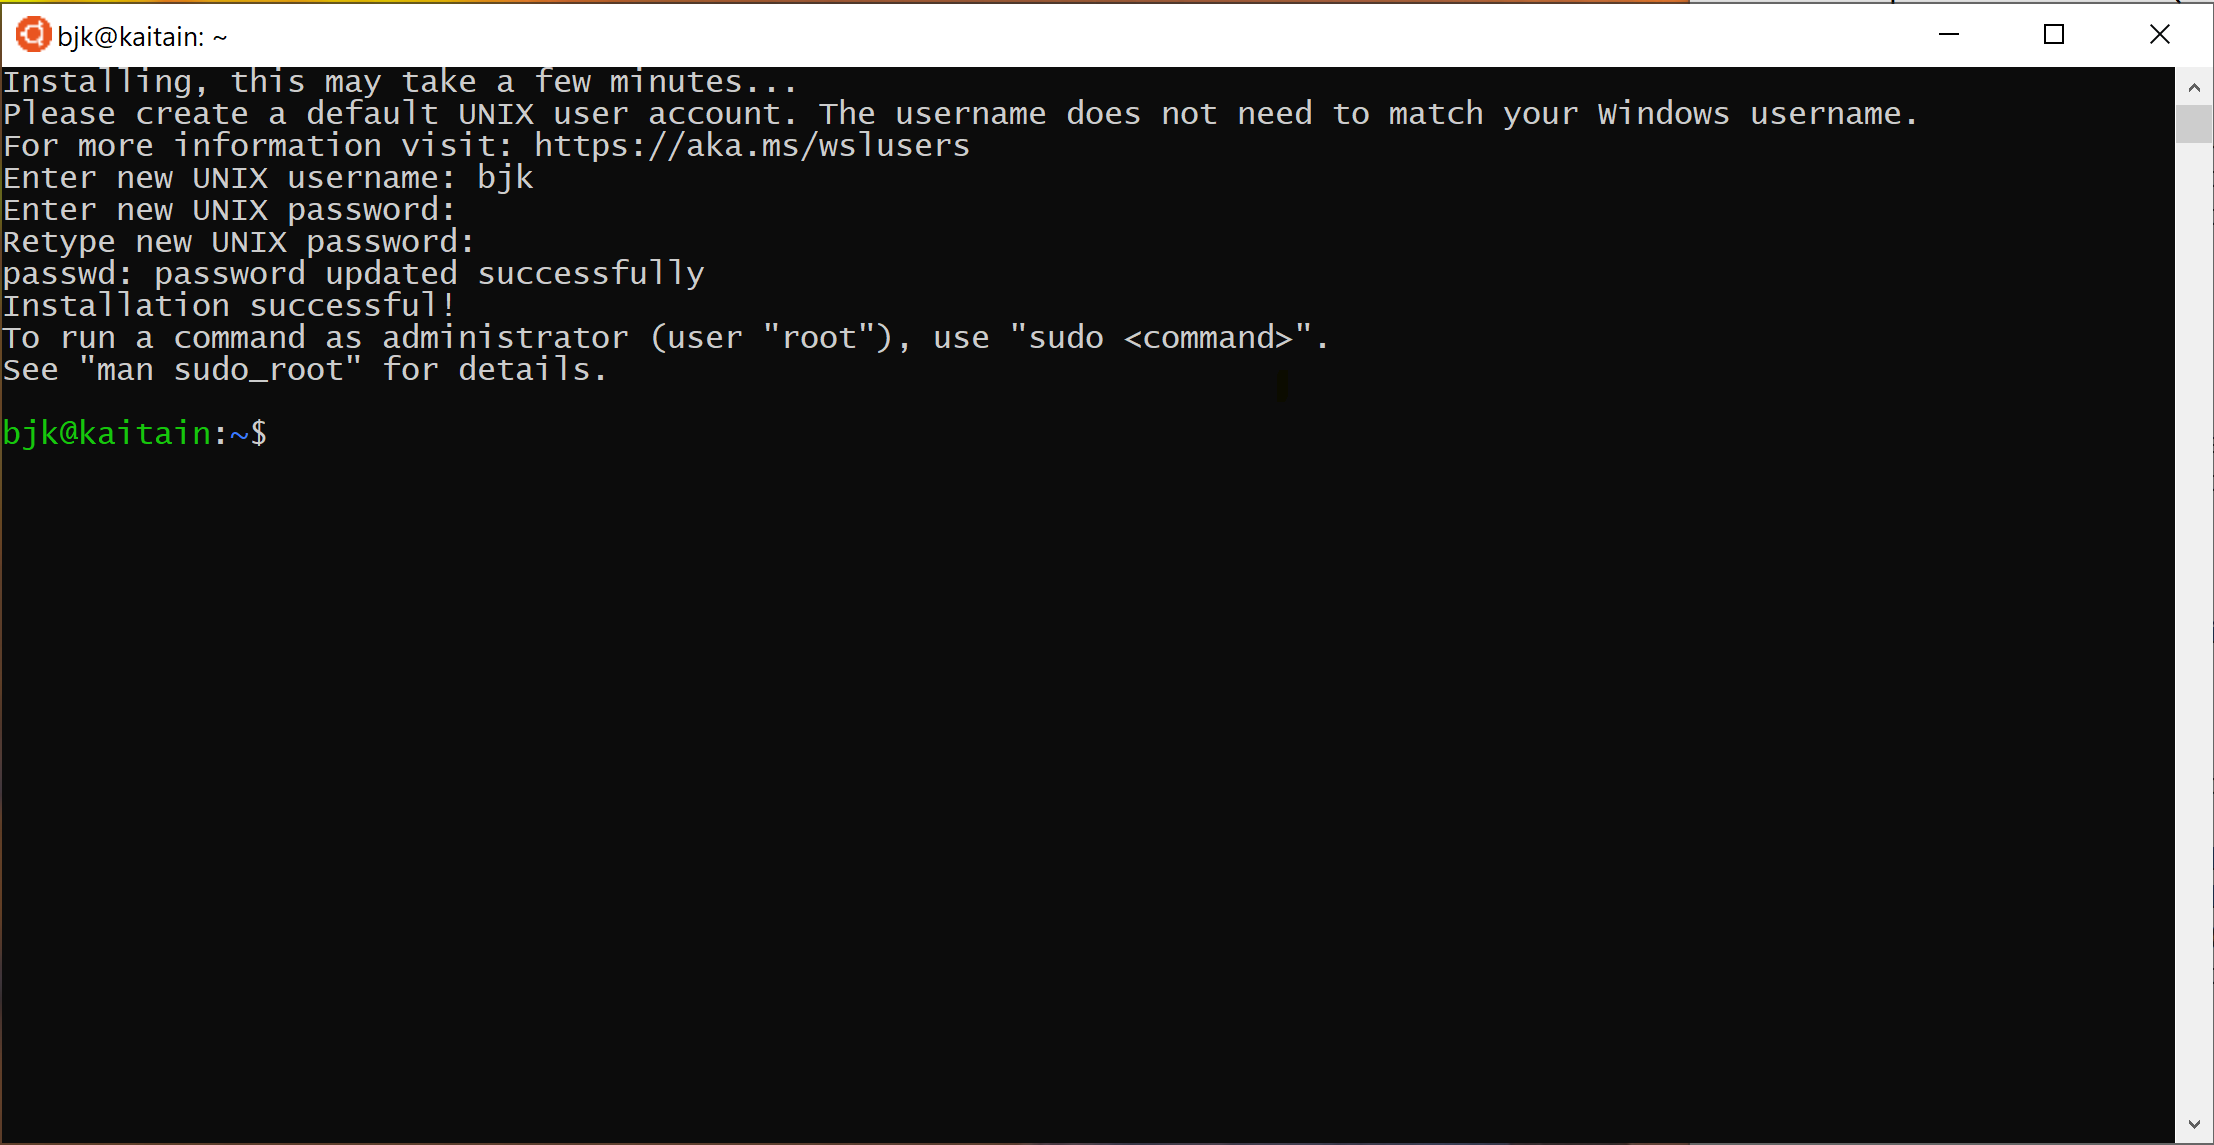
After a moment, it will ask for a username and password. These are your credentials inside the Linux world. You can choose any *nix friendly username.
- Download and install Visual Studio Code
Go to the VS Code website and download it. Install it when the download is complete.
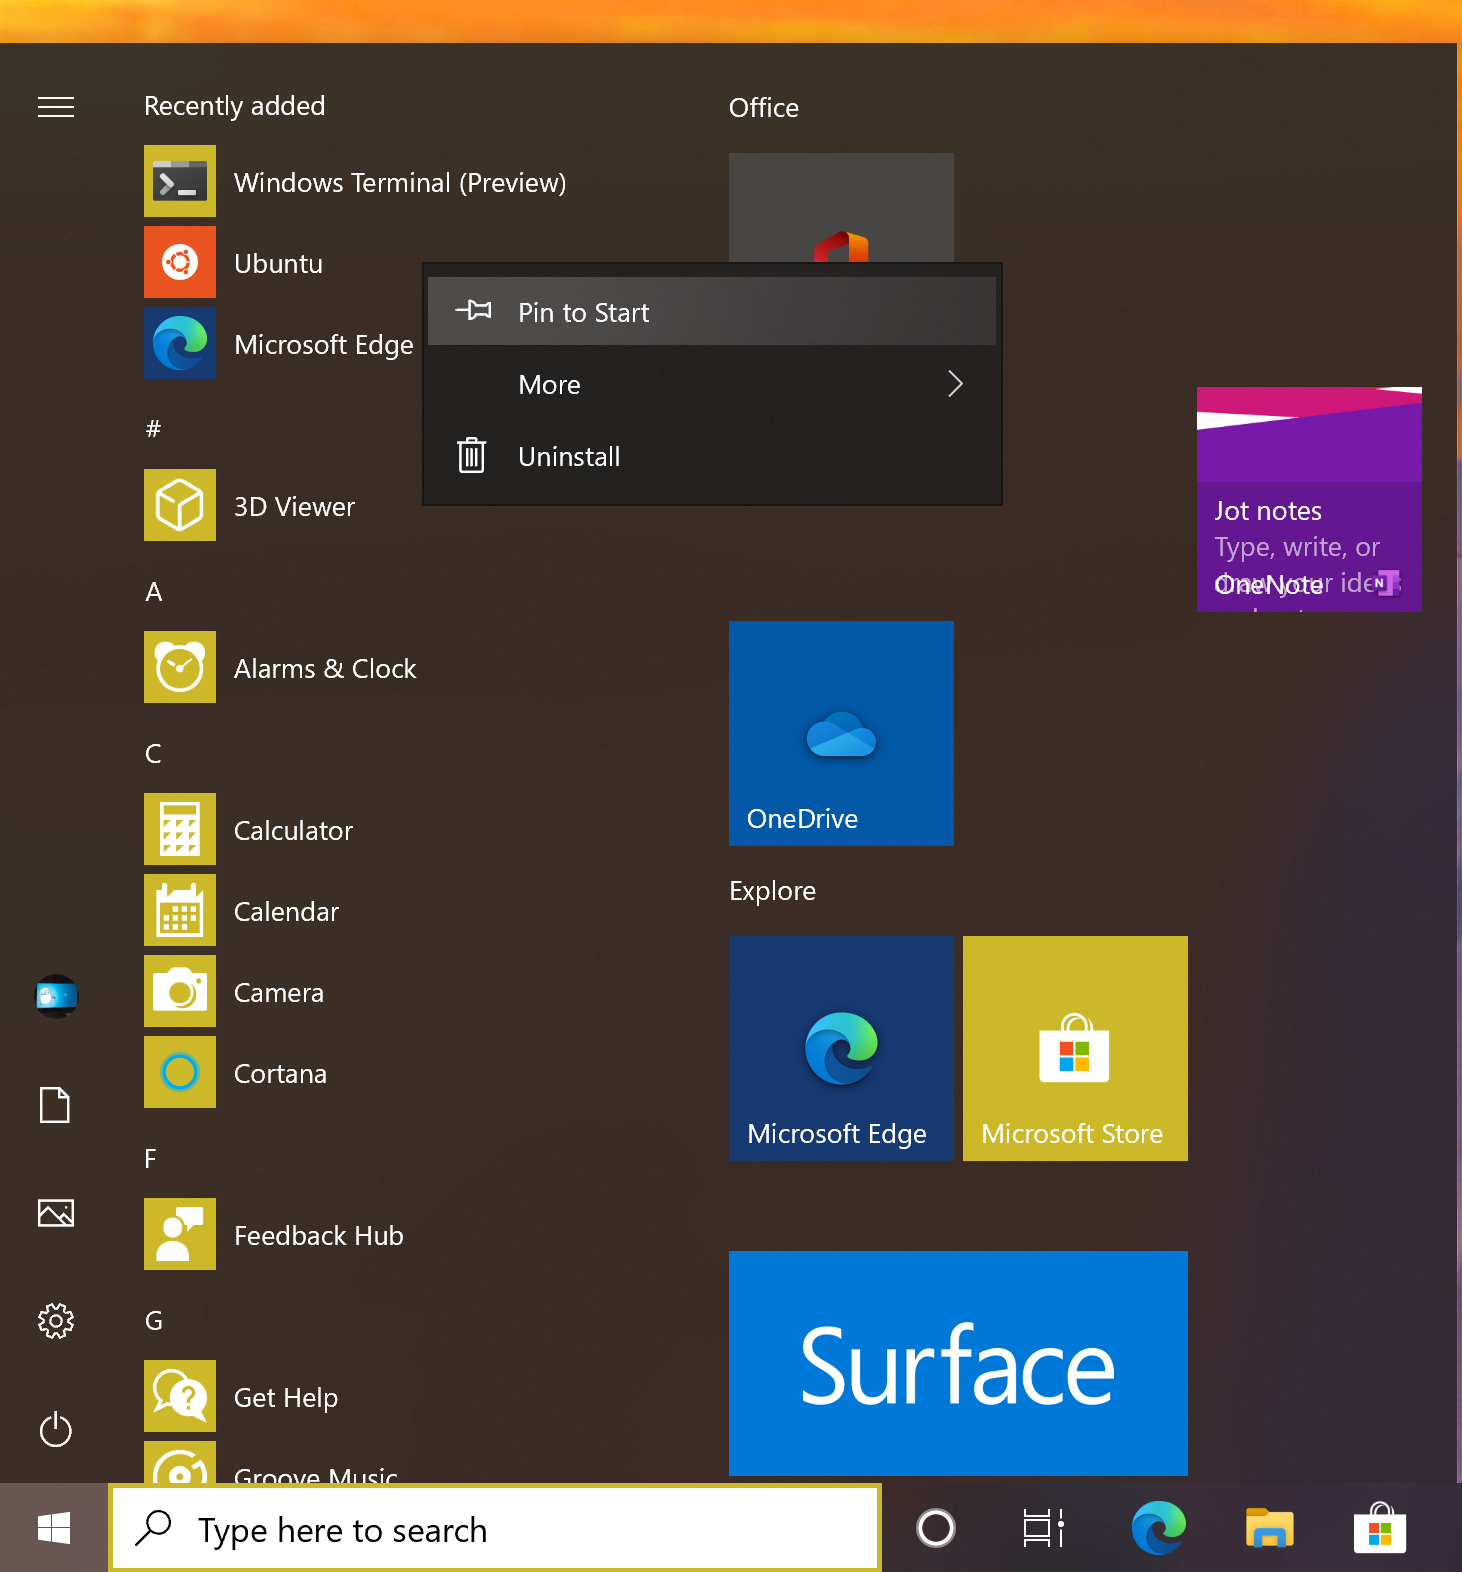
- Pin VS Code and Windows Terminal to your start menu (and maybe your taskbar)
- Install the Remote WSL extension in Visual Studio Code which is part of the VS Code Remote Development extension pack

- Configure Windows Terminal
Open Windows Terminal, then click the "down arrow" next to the new tab button. Choose "Settings".
Find the stanza with your "Ubuntu" installation and copy the guid. Paste it into the value for "defaultProfile" at the top of the settings file.

While you're in there, download Cascadia Code PL and install it (by double-clicking on the ttf file). Edit your "Ubuntu" profile in the Windows Terminal settings to use the new font:
	{
            "guid": "{2c4de342-38b7-51cf-b940-2309a097f518}",
            "hidden": false,
            "name": "Ubuntu",
            "source": "Windows.Terminal.Wsl",
            "startingDirectory": "//wsl$/Ubuntu/home/YOURUSER",
            "fontFace": "Cascadia Code PL",
            "fontSize": 12,
        },
Finally, change your starting directory too, by modifying the "startingDirectory" value. Change YOURUSER to the username you chose when you installed WSL. Mine was bjk. If you don't do this, WSL will start up in your Windows User profile directory, which will be mighty confusing since it's not $HOME.
Sidebar
In the last step we set the starting directory for Windows Terminal's Ubuntu instance to //wsl$/Ubuntu/home/bjk. This is an awesome little trick you can use from the Windows side of things to browse your WSL file system. Sometimes Windows Explorer is much easier than using some bash commands to move files around. Speaking of bash commands, by default your C:\ drive is mounted in WSL at /mnt/c. How awesome is that? You can do all kinds of crazy things using these interop tricks. See the references and links below for more.
To navigate there directly enter \\wsl$ in the address bar of Windows Explorer:

Continuing On
- Install your dotfiles
Mine are on Github. I created a git.io shortcut so I could curl | bash install them. Install yours however you're accustomed. If you're searching for options, I am enjoying chezmoi these days, my repo is a good starting point, showing how you can do different installation tasks by operating system.
Note that WSL is just Linux, Ubuntu to be precise (get that??). You shouldn't have to modify anything if your dotfiles are already Linux-friendly.
Docker
Recently Docker announced a version of Docker Desktop that works very nicely with both the Windows and WSL sides of your development. Impressive reading in that link if you're interested in the technical details. Follow the directions in that link to install and enable WSL2-friendly Docker Desktop.
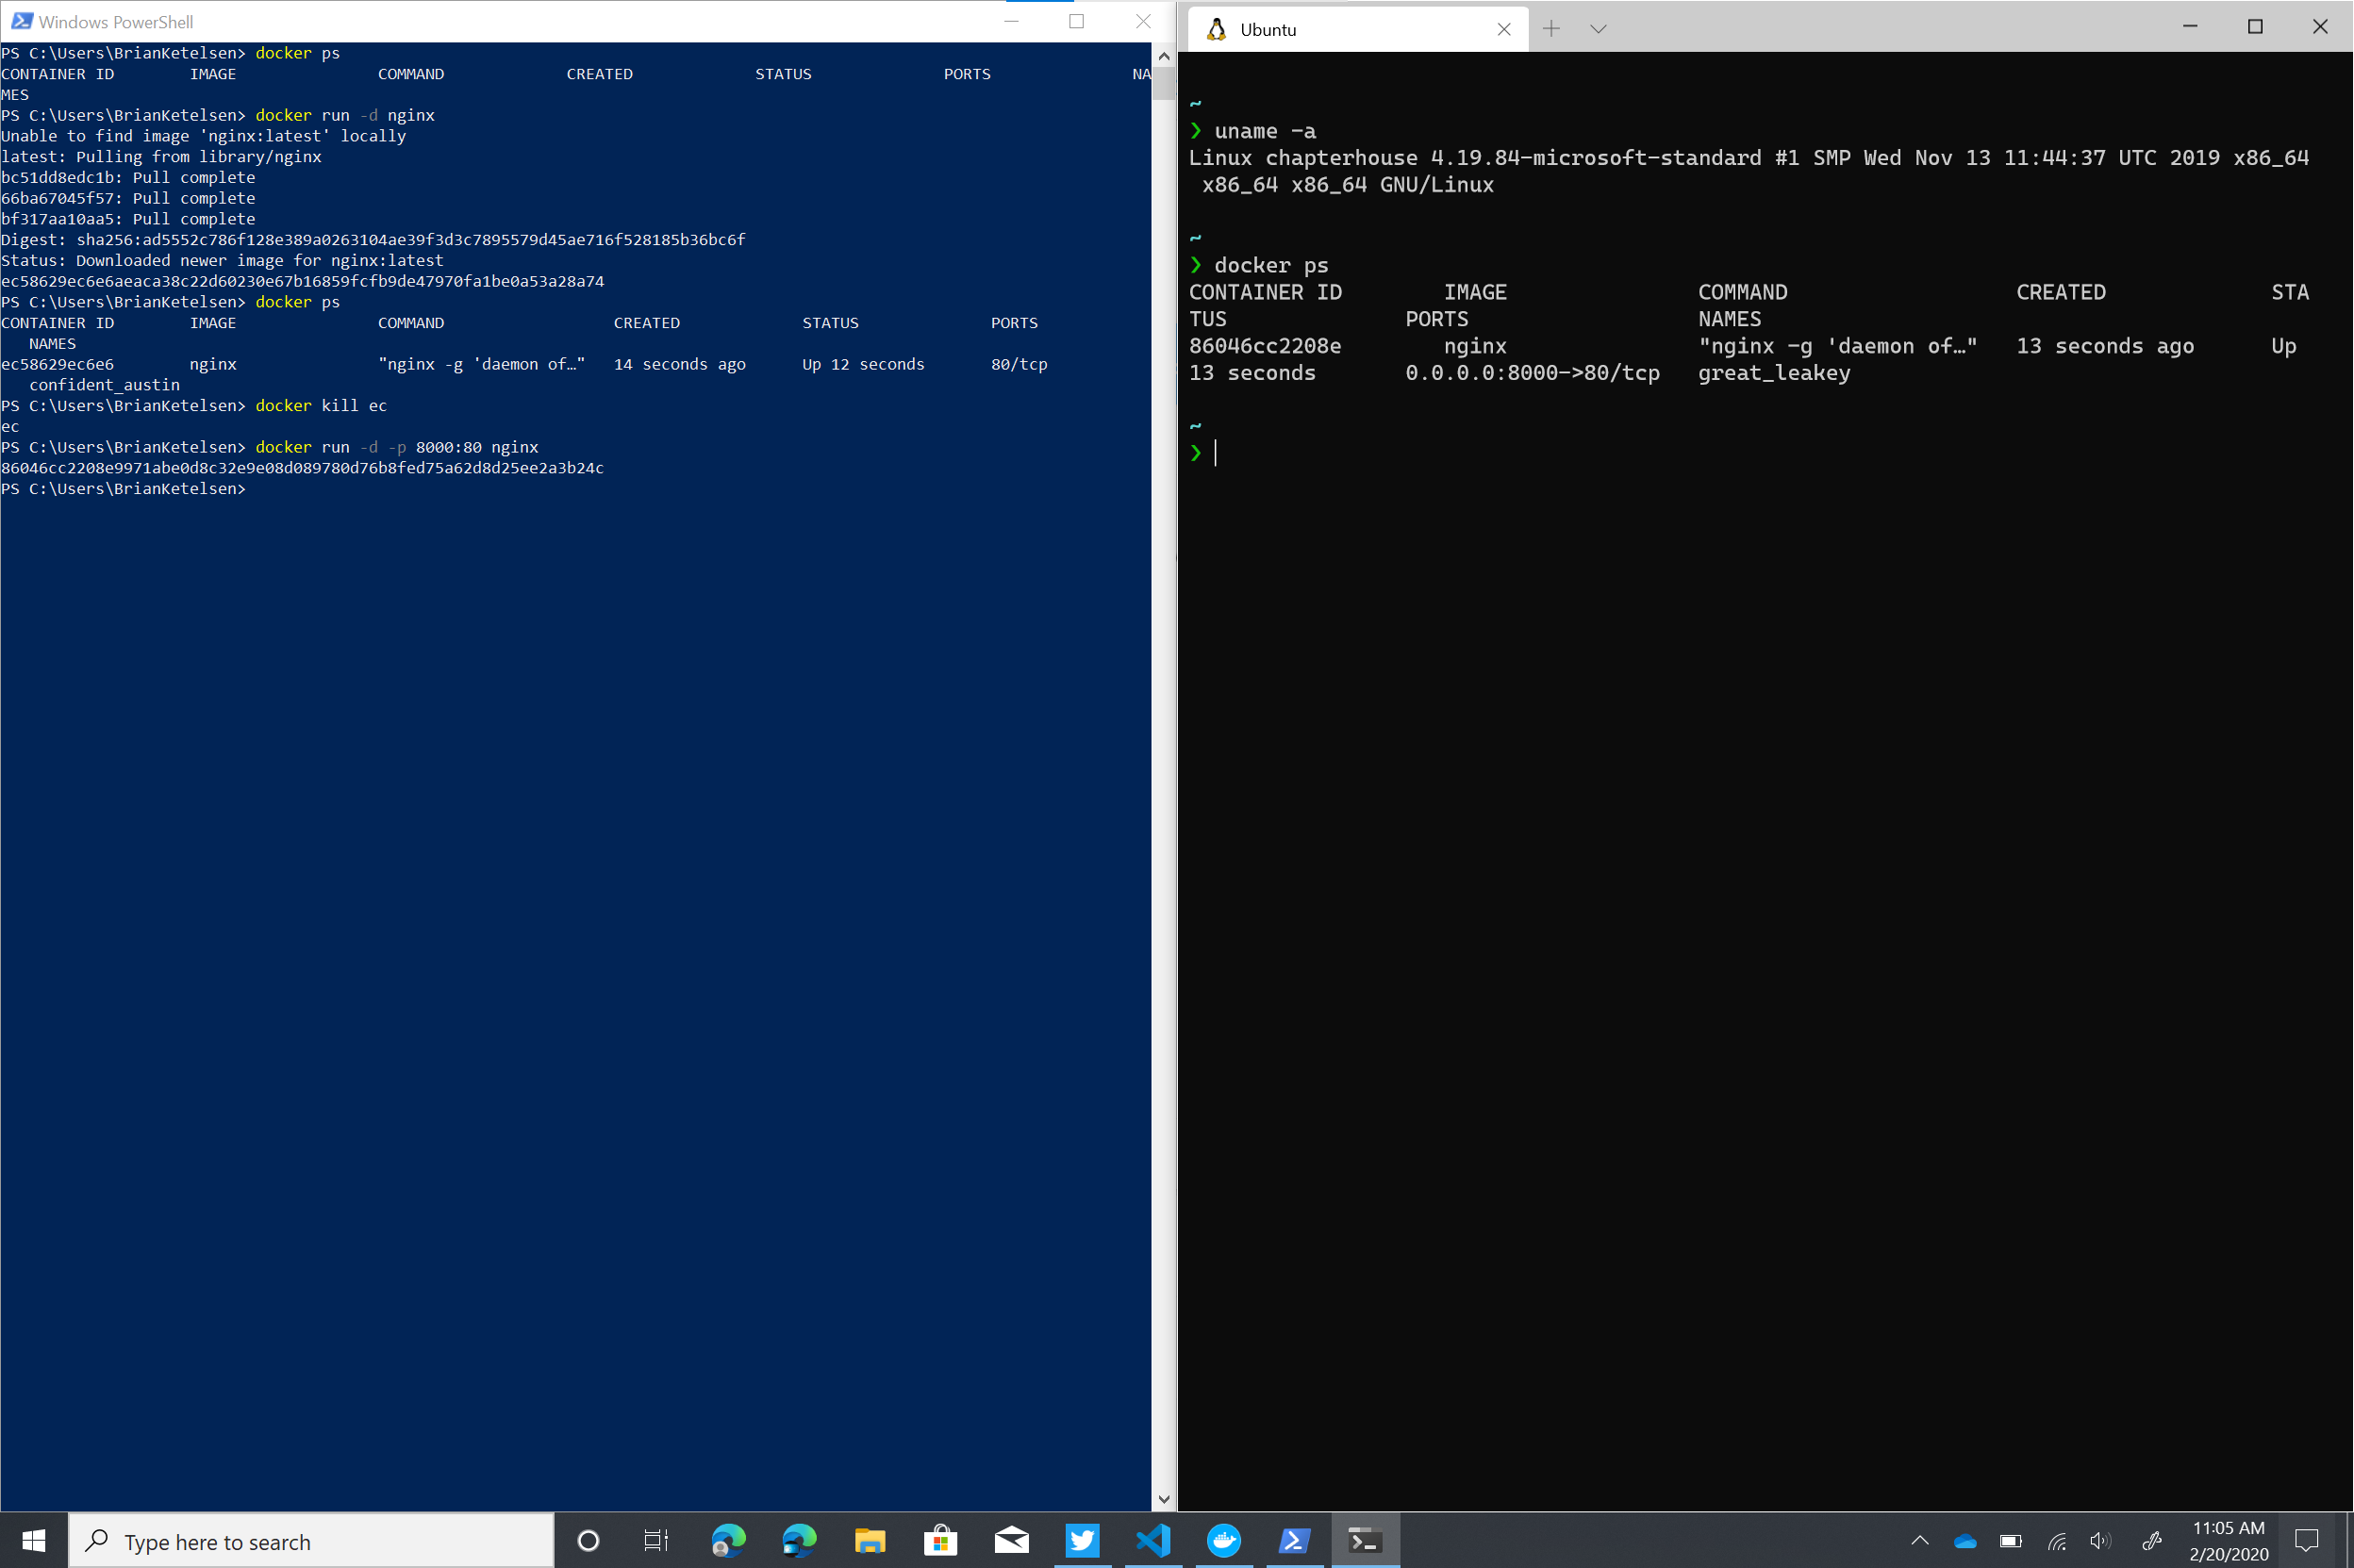
You can even just install Docker Engine - Community for Ubuntu right inside WSL, if you prefer.
Finally, once we have WSL setup the way we'd like, we can export and import our distro(s) to or from a tar file using the following commands:
wsl --export <Distro> <FileName>

wsl --import <Distro> <InstallLocation> <FileName>
This allows you to move a WSL installation to a new computer if necessary, or just keep a backup somewhere safe.
Integrations
If you're in the terminal in a directory you want to edit, you can type code ., which will open Visual Studio Code on the Windows side (!! right?? !!) and install the "Remote WSL" extension for you. Crazy awesome stuff.
Conclusion
From here you are ready to clone a repo and start making changes. Follow along here as I add more tips and tricks that I discover on my journey to reduce the number of physical and virtual computers required to do my job.